Friday, October 30, 2015

Our Pumpkin Patch - Cute Family Autumn Craft

Activity completed October 6, 2015.

This was a super easy, but adorable little picture we put together in October.


Supplies
White cardboard
Orange paint
Green marker or paint
Black Sharpie

I decided to mix together red and yellow paint to show Tripp how it turned orange. I put two globs of each color of paint on a strip of aluminum foil, then gave Tripp a toothpick (or, as he calls it, "pick pick"). We each mixed together our globs of paint and watched it turn orange.

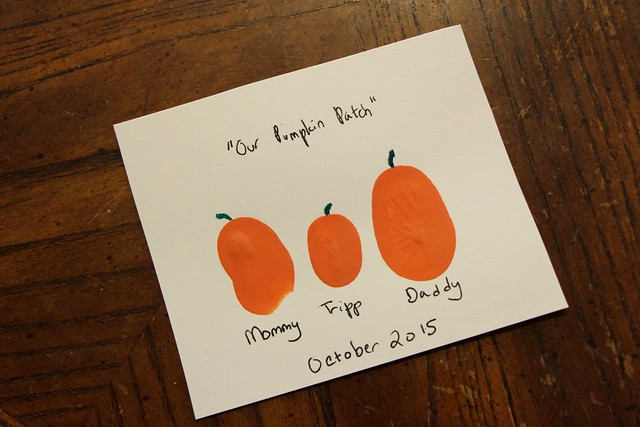
Then I dipped Tripp's thumb in the orange paint and pressed it on the paper. I did the same, then we corralled Tripp's daddy into doing it.

Once it dried I added green 'stems' and the words on the picture.

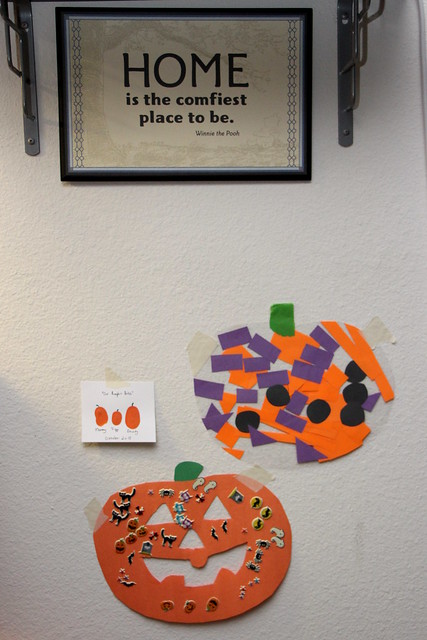
I think it looks adorable!

Friday, October 23, 2015

Shape Pumpkin

Activity completed October 6, 2015.

We made a fun Shape Pumpkin this October!

Supplies
Contact paper or Scotch single-sided laminating sheets (2)
Construction paper or tissue paper cut into shapes - rectangles, squares, circles, triangles, etc.
Painter's tape (optional)


I cut out the shape of a pumpkin from the laminating sheet and pulled the backing off to expose the sticky side. I added a green stem too. Tripp had a lot of fun with the stickiness! I used painter's tape to hold the pumpkin to the table, but it wasn't really necessary.

Then I just let Tripp put the shapes on as he wanted. While he did we talked about each shape and the colors of the construction paper.


When we had used up all of the shapes, I put another laminating sheet over them and cut out the pumpkin shape. Then we had our finished pumpkin!


This would be a really easy activity to adapt to an older child. You could let them cut out the shapes, for example. I think I may repeat it next year and see how his pumpkin evolves!

It would also be easy to do with other shapes, like Christmas trees, ghosts, etc.

I think this would look nice in a window, but Tripp decided that we should add it to what is quickly becoming our Pumpkin (or punkin, as he says it) Wall.


Friday, October 16, 2015

A Painted Jack O'Lantern

Activity completed September 29, 2015.

I found a pair of these thick cardboard jack o'lanterns at Hobby Lobby and picked them up for us to decorate. One I kept as a stencil to trace onto construction paper. The other I let Tripp paint. He wasn't very interested, but he painted a good amount of it.

I put it up on our screen door where I usually put seasonal "Welcome" signs. This really helped him take ownership and pride in the project. Whenever he'd see another pumpkin, he'd talk about the pumpkin outside.

Friday, October 9, 2015

A Pretty Flower Window Garland


 Project completed 8/18/15

I love having fresh flowers in the house, but unfortunately both of our cats like them too - a bit too much. They will find any flowers I put out and either knock the vase over or chomp them to bits. When this happened recently to a bunch of flowers, I decided we could turn them into a pretty window decoration instead. It was easy and still adds that pretty look of flowers.


For this project we used:
  • Flowers
  • Contact paper (or these laminating sheets)
  • Construction paper
  • Pencil
  • Scissors
  • Hole punch (optional)
  • Ribbon (or string) 

First I traced a cup eight times on yellow and purple construction paper to form the circles (the rim of the cup for the wider circle and the bottom of the cup inside). I cut these out to form rings.


On the laminating sheets, I laid the rings down on two laminating sheets - four for Tripp and four for me. I let him choose the colors and he picked two purple and two yellow rings.

Then we pulled apart the flowers, talking about the types of flowers, the colors and how sticky the laminating sheet was.


After the circles were filled, I put another sheet on top of both of our laminating sheets and pressed down to seal them together. I cut the circles out and carefully pressed as hard as I could to get all the air out.

These were fun for Tripp to look at. Almost like real nature flash cards or something like that.


Then it was simple to cut out a hole and string the circles on ribbon. Attached to the playroom window, they make a pretty nature display!

Friday, October 2, 2015

Free, Random Play

I have been working on setting up our extra bedroom as a playroom for Tripp, and in doing so I've decided to keep my old Ikea Expedit desk as a craft station. Slowly I'm consolidating all of the random craft supplies in the house into this one spot (I have more than you'd think, for someone who doesn't really consider herself artistic). It has worked so well, with tons of storage, and has been a spot for many fun activities and crafts. It's really nice to have a little corner of the house set up just for creativity.

The other day I was looking through some craft supplies and Tripp spotted some dowel caps. Add to that some beads, air dry clay (could have used play dough, too, but I decided to use up the rest of the clay), and some Lakeshore implements he got for his birthday from his cousin, and why not have some creative open ended fun? I put it all into a disposable aluminum baking sheet and let him do what he wanted.


He had fun putting the beads into small plastic containers and dumping them out, asking me to form balls of clay and then picking them up with the tongs, rolling the dowel caps around and pressing beads into the clay. The air dry clay we used was from Crayola and was sparkly, too, which added a fun dimension to his explorations. So fun!

He spotted some glitter glue from the same cousin at the end of his play and of course we couldn't stop without trying that!