Friday, July 31, 2015

Waterfall Pipette Art

I found this idea on the website Teaching 2 and 3 Year Olds. Tripp's not quite 2 yet, but he will be at the end of the month, and I thought he'd get a kick out of the pipettes and the streams of paint. So off I went to Amazon, ordered a pack of 100 pipettes, and found a Sunday with some free time.

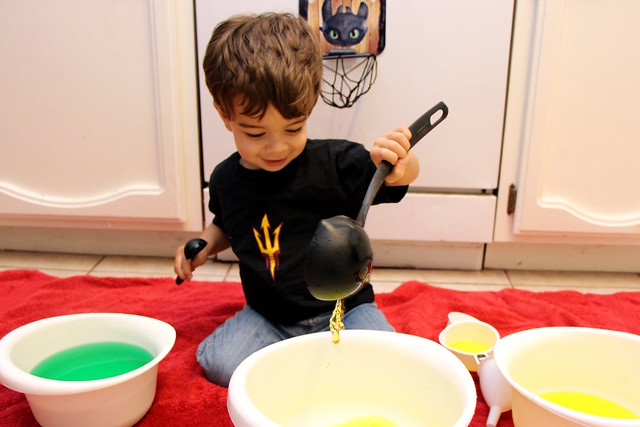
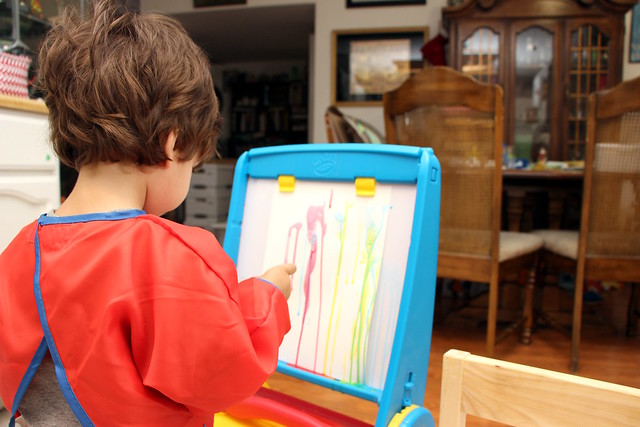
I set up paper on Tripp's easel. I put it on top of an old sheet we use for any painting activities - he recognizes it now and knows when it's time for paint, and it's a lifesaver for cleaning up. I let him pick out the colors for the paint. He chose red, yellow, and blue, which I watered down in old Tupperware containers. Then I showed him how the pipettes worked and it was off to the races. He really enjoyed this activity!

Supplies:
  • pipettes
  • paint
  • containers for paint
  • water
  • paper
  • something to prop the paper up vertically on, such as an easel
This activity benefits:
  • fine motor control (getting paint into and out of the pipettes)color recognition
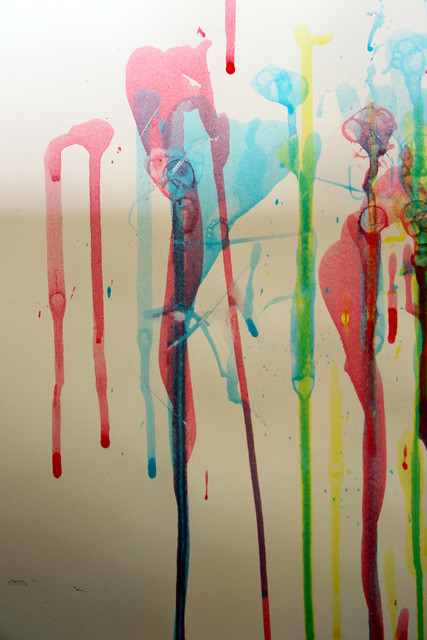
  • color mixing (as the yellow and blue mixed, for example, you could see streaks of green)
  • knowledge of gravity and the difference between vertical and horizontal
  • social skills (communicating which color to use, asking for help)

 Our finished product...

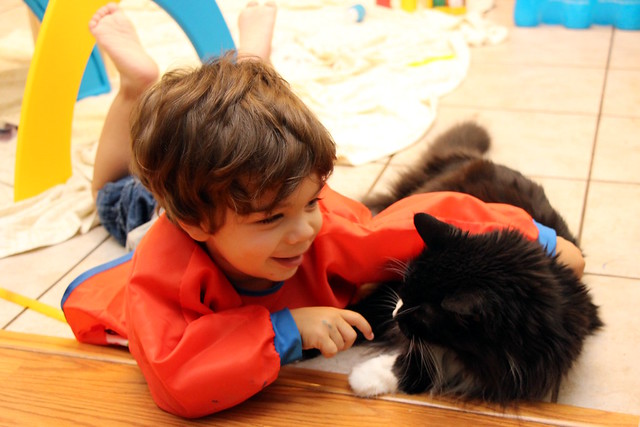
Of course no little artist's day is complete without kitty snuggles.


Friday, July 24, 2015

Water Color Mixing Activity

I have to say I think this is Tripp's favorite activity we have done so far and definitely one we need to repeat soon.


Super simple... you just need:
  • Containers (mixing bowls, Tupperware containers, old takeout containers, whatever!)
  • Spoons, cups and measuring cups of all sizes
  • Water
  • Food coloring
  • A towel, if indoors
Fill each bowl with a small amount of water and food coloring. Set out the bowls and the spoons and let your child practice scooping, pouring and mixing. The food coloring adds a fun element as the water changes color as it combines! When done, just dump out the bowls and put the towel (and probably your child's clothes) through the wash. Easy peasy.

I recommend starting off with a small amount of water in each bowl, and only a few bowls to start off with. You can always add more but starting with less lets you expand as needed and isn't overwhelming right from the start.


There's so much you can talk about with this activity... colors, measurements, volume, liquid vs. solid, wet vs. dry, etc. They get some motor development in there too. Heck, even test out Piaget's Theory of Conservation with them!

Friday, July 17, 2015

A Toddler's Little Garden

A few weeks ago we put together a little garden area for Tripp. We collected a watering can, plant stand, pots, and plants (daisies and peppermint) from Home Depot, plus some solar powered tulip lights from the Dollar Tree. An enjoyable hour was spent in the sun transplanting the plants and putting together the little garden spot.

The garden spot

Each morning we try to remember to water the plants and watch them grow. It's been a bit of a challenge in the Arizona heat and I think we need to rethink our placement or our plant choice, but overall, it was a really fun activity to do.

Planting some solar tulips


Friday, July 10, 2015

Painting With Water

This is a fun activity we did recently at my library's play/parenting group for ages 0-5. It was super simple... all that was required was a bucket, water (soap optional), and various types of sponges.


The kids were turned loose on the courtyard and got to "paint with water" - i.e. clean the place up! Most of the kids really enjoyed seeing how they could make marks on the wall and ground with the water. Tripp was surprisingly diligent and I liked seeing all of the nooks and crannies the kids found to "paint" in. When one kiddo found a spot, everyone clamored to try painting there. Plus, no clean up... they already did that for us.

Sometimes the simplest things are the best and most fun!

Friday, July 3, 2015

We Heart Tape Resist Art


Tape resist art is one of my favorite projects to do with Tripp. Brightly colored paint, tape (just as fun as stickers for him), a mess and a pretty picture at the end - what more could you ask for?

It's a great project for young kids because they can be completely free, and you can still shape it to fit the occasion.

For Father's Day, I decided to make some tape resist art with Tripp using his name for his grandpa, Tata. I like to use small canvases from the craft store for this craft. I just keep an eye on sales and coupons - you can often find good deals. I use masking tape, which adheres easily to the canvas and comes off easily at the end.

In the past I have used fingerpaint but this time around I decided to use acrylic paint. Tripp does not generally make too much of a mess with paint so I wasn't worried about washing - and the acrylic has a bolder color and dries more quickly. If he were in a messy mood, though, I'd stick with the fingerpaint or washable paint.

This project is simple: spell out the desired word using masking tape and stick it carefully down on the canvas. Pick out some colors or let your kiddo choose, and go to town painting. When it is mostly dry (but not completely dry), carefully remove the tape. Voila!


Here's one we did for Valentine's Day, in the bottom left corner. This was using fingerpaint, so the colors are not quite as bold but it turned out very pretty!